GnomeContinuous using systemd-nspawn
One of interesting projects from Gnome Community which tries to define a new way of packaging. I really don’t know how exactly OSTree works, but it generates daily builds (qcow2 images) for Gnome. The OSTree repository which helps in building qcow2 images for Gnome is called GnomeContinuous. Similarly, there is another OSTree repository which builds qcow2 images for Fedora is called rpm-ostree.
Someone in the vast internet call this tool as
Poor Man's Virtualization. This is nothing but the good old chroot jail with modern walls (namespaces).
So, my experiment is to boot gnome-continus generated qcow2 image using systemd-nspawn to run a pure gnome OS parallelly. First thing is to download the gnome-continuous qcow2 image.
Note
all commands in this post executed under root
# wget http://build.gnome.org/continuous/buildmaster/images/z/current/gnome-continuous-x86_64-devel-debug-20140720.0.qcow2.gz
# gunzip gnome-continuous-x86_64-devel-debug-20140720.0.qcow2.gz
# ln -s gnome-continuous-x86_64-devel-debug-20140720.0.qcow2 gnome.qcow2
In order to open-up qcow2 images, qemu provides a tool called
qemu-nbd. this tool requiresnbdkernel module to be loaded. So, load nbd driver as root,# modprobe nbd # qemu-nbd --connect /dev/nbd0 gnome.qcow2
Now, we have associated /dev/nbd0 with qcow2 image. This image contains three partitions(boot, swap and root), we have to seperate them into loop devices,
# parted /dev/nbd0 unit B print
Model: Unknown (unknown)
Disk /dev/nbd0: 8589934592B
Sector size (logical/physical): 512B/512B
Partition Table: msdos
Disk Flags:

Number  Start       End          Size         Type     File system     Flags
1      32768B      209747967B   209715200B   primary  ext4            boot
2      209747968B  276856831B   67108864B    primary  linux-swap(v1)
3      276856832B  8589934591B  8313077760B  primary  ext4

# losetup -o 276856832 -f /dev/nbd0
# losetup -o 32768 -f /dev/nbd0
# losetup -j /dev/nbd0
/dev/loop0: [0005]:849 (/dev/nbd0), offset 276856832
/dev/loop1: [0005]:849 (/dev/nbd0), offset 32768
#
Now we have to get the ostree boot parameter from /dev/loop1 (which is the boot partition in qcow2 image)
#mkdir boot
#mount /dev/loop1 boot
#grep 'ostree=' boot/syslinux/syslinux.cfg
APPEND root=LABEL=gnostree-root quiet splash ostree=/ostree/boot.0/gnome-continuous/f5a97103e9911b5a19ec154ecccfc6bd77f43e90e27a64adabf054e4db06c38b/0
#umount /dev/loop1
#rm boot
ostree boot parameter is importent for ostree tools to operate properly, so we have to append this boot parameter into our host machine’s /boot/grub/grub.cfg so that this boot parameter will be reflected in /proc/cmdline. Open your host machine’s /boot/grub/grub.cfg and append ostree parameter like this,
linux   /kernel-genkernel-x86_64-3.14.0-sabayon init=/sbin/init root=UUID=80b5a49b-4156-49b3-ab4d-71d1de2dca36 resume=UUID=7550843f-1e8a-4c8e-b9a3-3c9907164726 ro rd.auto rd.lvm.vg=vg_mohanlaptop rd.vconsole.keymap=us quiet splash ostree=/ostree/boot.0/gnome-continuous/f5a97103e9911b5a19ec154ecccfc6bd77f43e90e27a64adabf054e4db06c38b/0
initrd  /initramfs-dracut-x86_64-3.14.0-sabayon
Once done, reboot your host machine and re-setup /dev/loop0 and /dev/loop1 as we did in above steps. We have to adjust root partition to stop plymouthd and modify default runlevel to multi-user instead of graphical,
# mkdir root
# mount /dev/loop1 root
# rm root/ostree/boot.0/gnome-continuous/f5a97103e9911b5a19ec154ecccfc6bd77f43e90e27a64adabf054e4db06c38b/0/etc/systemd/system/default.target
# ln -s root/ostree/boot.0/gnome-continuous/f5a97103e9911b5a19ec154ecccfc6bd77f43e90e27a64adabf054e4db06c38b/0/usr/lib/systemd/system/multi-user.target root/ostree/boot.0/gnome-continuous/f5a97103e9911b5a19ec154ecccfc6bd77f43e90e27a64adabf054e4db06c38b/0/etc/systemd/system/default.target
# mv root/ostree/boot.0/gnome-continuous/f5a97103e9911b5a19ec154ecccfc6bd77f43e90e27a64adabf054e4db06c38b/0/usr/bin/{plymouthd,plymouthd.disabled}
# umount /dev/loop1
# rm root
Now, time to setup the filesystems,
# mkdir root
# mount /dev/loop0 root
# mount --bind root/ root/ostree/boot.0/gnome-continuous/f5a97103e9911b5a19ec154ecccfc6bd77f43e90e27a64adabf054e4db06c38b/0/sysroot/
# mkdir /dev/exported
# ln /dev/loop1 /dev/exported/
Now we are ready to chroot,
# systemd-nspawn --bind /dev/exported -b -D root/ostree/boot.0/gnome-continuous/f5a97103e9911b5a19ec154ecccfc6bd77f43e90e27a64adabf054e4db06c38b/0
this will boot the qcow2 image which we downloaded and show a login prompt, get inside as root and mount the boot partition we exported from host machine which will be available inside /dev/exported/loop1,
GNOME-OSTree 0+snapshot-20140717 qemux86-64 console
qemux86-64 login: root
Last login: Sat Jul 19 22:38:48 SGT 2014 on console
root@qemux86-64:~# mount /dev/exported/loop1 /boot
Now, we can start the gnome session by running a X in host’s vt2 and point gnome-session inside chroot to connect to DISPLAY=:1
In Host Machine,
press ctrl-alt-f1 and login as root, then type this command
# X :1 vt2
Above step will start another X server in vt2 (you can switch between different X servers using ctrl-alt-f[1-9]).
Inside Systemd-Nspawn type,
root@qemux86-64:~# DISPLAY=:1 gnome-session
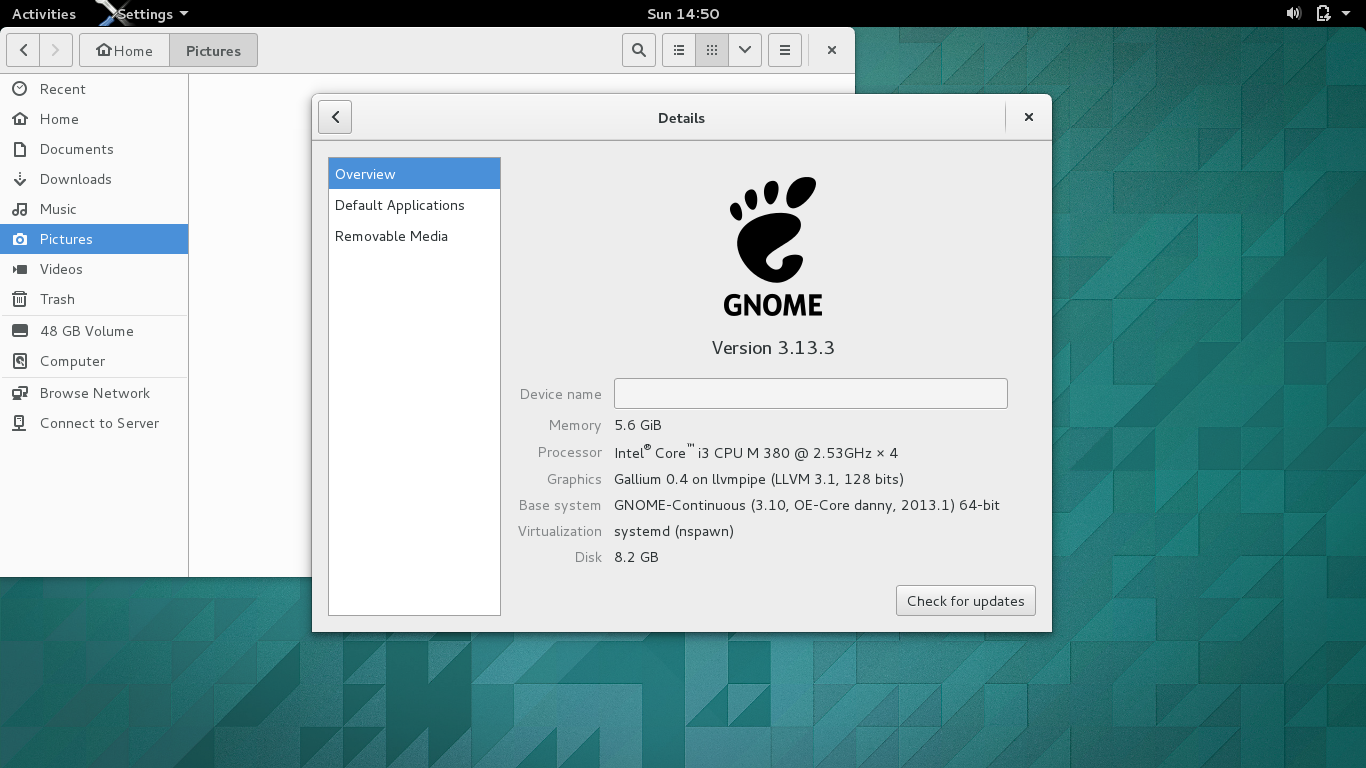
This will start gnome session in host machine’s vt2(ctrl-alt-f2) and show the latest gnome version built by OSTree which you downloaded as qcow2 image in the first step,

Also, you can verify which ostree version the current qcow2 image pointing to, open a gnome-terminal in the gnome-session started in vt2(ctrl-alt-f2) and type the below command,
root@qemux86-64:~# ostree admin status
* gnome-continuous 9b441d1f14c4caea17eb2b50a778da4a08e31cbbdf1104edf2cd2cb40a4e3374.0
  origin refspec: gnome-continuous:gnome-continuous/buildmaster/x86_64-devel-debug
root@qemux86-64:~#
you can also update to the latest version of gnome using following command,
root@qemux86-64:~# ostree admin upgrade
To stop the gnome-session, go to the terminal where you started it and press ctrl-c. It will stop the gnome-session on vt2(ctrl-alt-f2) and give root prompt, now type following command to shutdown the systemd-nspawn machine
root@qemux86-64:~# systemctl poweroff
You will be back to host machine. Now, type following commands to peacefully disconnect everything,
# umount /dev/loop0
# umount /dev/loop0
# rm root
# rm -fr /dev/exported
# losetup -D
# qemu-nbd --disconnect /dev/nbd0
Thats it, the qcow2 image will be properly closed. Well, if you don’t understand the steps in this post, commant here, I’ll try to explain as much as possible.

